Essential Steps for Maintaining an Air Conditioning Unit to Prevent Accidents
In 2016, the National Fire Protection Association in the United States published a report that revealed that an estimated 7,800 home structure fires were in some way caused by faulty air conditioners, fans or related equipment. Sadly, in those fires, fifty people were killed.
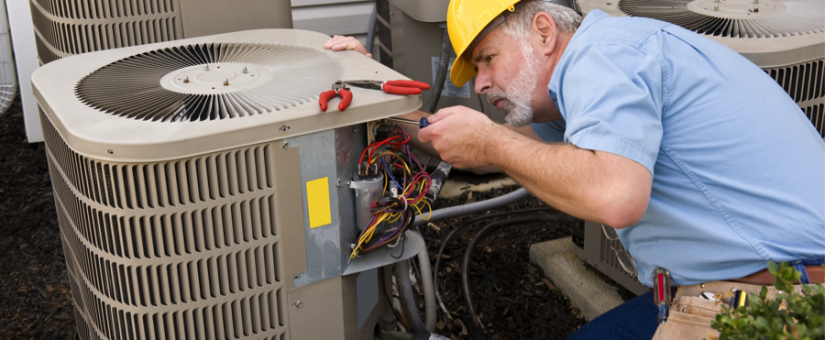
This brings to light the sobering reality that your air conditioning unit can be a hazard in your home if not properly maintained. To ensure your safety and that of your family members, here are some essential maintenance steps to help prevent deadly accidents:
Step 1: Shut Off the Power
Since air conditioning units are powered by high voltage electricity, you must power off the unit to avoid electrocution. To turn the unit off, you will need to find the shut-off box near the unit on the exterior condenser. You should also turn the power off at the breaker box.
Step 2: Remove Debris
The next step is to use a screwdriver or wrench to remove the fasteners on the fan cage on the exterior condenser. Then, you will need to use your hand or a wet/dry vacuum to remove leaves and other debris from the interior.
Step 3: Clean the Fins
After you’ve removed the debris from the exterior condenser, you will need to clean the fins. This will require a powerful shop vacuum with a brush attachment to get rid of the dirt. Then, with a hose, spray through the fins from the inside. Ensure you use a garden hose on low pressure since pressure washers can cause damage to the fins. If the dirt build-up is stubborn, you can purchase a fin cleaning spray which can be found in most home improvement stores.
Step 4: Straighten Bent Fins
If you notice any bent fins, use a butter knife to straighten them. This will help to improve airflow and, in turn, improve the efficiency of the unit. While straightening the fins, you will need to exercise extreme caution so as not to damage the embedded tubing within the fins.
Step 5: Clean the Area Around the Unit
Once you’ve cleaned the condenser, replace the fan cage and then rake leaves and debris from around the unit. You should also cut tree branches or bushes that are growing within two feet of the unit.
During the fall and winter when the unit is not in use, use a piece of plywood or plastic to prevent debris from falling on it. However, never completely cover the sides as this may cause moisture to build up inside resulting in corrosion. If you completely cover the unit, it may make it more inviting for pests as well. Always keep the unit uncovered when the unit is operating.
Step 6: Level the Unit
Sometimes, the condenser unit can slope as the earth beneath it settles. When this happens, it can cause the unit to fail early. If the unit is sloping, use rot-resistant shims to make it level.
Step 7: Clean the Evaporator Coil
On the inside, you will need to locate the blower unit. To get to the blower unit, you may need to remove some foil duct tape, screws, and bolts. Then you will need to dust off the coil using a soft brush and then spray the coil with a coil cleaner. At first, this coil spray will foam up before dripping down to the drain pan. Clean the drain pan with hot soapy water and a little bleach.
Step 8: Unplug the Evaporator Drain
If the evaporator drain is clogged with algae and mold, you will need to clear it to prevent the plugged drain from flooding your home. Usually, the evaporator drain is a PVC pipe that is one inch in width. This pipe is normally white, grey, or black. You will need to follow that pipe to see where it drains. When you’ve found where the pipe drains, use a wet/dry vacuum to clear it.
Step 9: Change the Blower Filter
You must change the filter in your air conditioner at least twice a year. When replacing the filter ensure the new filter has the same air-flow rating as the previous one. You will find the filter inside the air conditioning unit where the air return duct is. Use a screwdriver to open the filter enclosure to remove the old filter and install the new filter then close the latch door.
Step 10: Turn the Unit Back On
Once you’ve completed the abovementioned steps, the last thing you will need to do is turn the air conditioner is to turn the unit back on.
When should you call an HVAC technician?
In order to keep your unit in good working order, there are some air conditioner repair in Mississauga ON and maintenance tasks including some mentioned above that only a trained HVAC technician will be able to perform. So, you must still have the system checked regularly by an expert. The recommended maintenance schedule for your air conditioner by an HVAC technician is once per year.
Do you need air conditioning repair and maintenance in Toronto or surrounding areas?
If you are searching for an HVAC technician in Toronto, contact us at Martino HVAC.
At Martino HVAC, we have been performing air conditioning repair and maintenance in the Greater Toronto Area for over 30 years and we pride ourselves on providing reliable service. With our regular inspections and cleanings, we will keep your heating and cooling systems running safely and at peak efficiency and ensure your warranties remain valid. All our technicians are fully licensed and trained professionals, so you can trust that your HVAC system is in good hands.
So, what are you waiting for? Give us a call today to request a free quote for our air conditioning repair in Brighton and maintenance services.


